

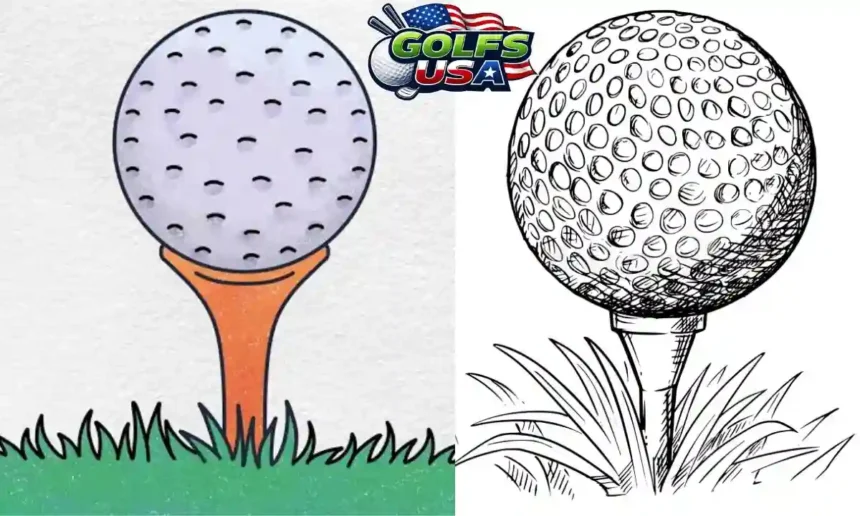
To draw a golf ball on paper, start with a clean circle, add light curved guidelines to show it is round, fill it with rows of small dimples that shrink and turn oval toward the edges, then shade one side and add a highlight and a shadow underneath. To draw a golf ball on the course, aim your body slightly right of the target, keep the clubface pointing between that line and the target, and swing along your body line so the ball starts right and curves gently back to the left (for a right-handed golfer).
People ask how to draw a golf ball for two very different reasons, so this guide covers both. The first half is a simple step-by-step drawing tutorial that works for beginners, kids and anyone who wants a realistic pencil sketch. The second half is for golfers who want to learn the draw shot, with the setup, swing keys, drills and fixes you need to curve the ball on purpose.
Part 1: How to Draw a Golf Ball on Paper
Golf balls seem to be simple, but it is the dimples that make a realistic drawing. Draw the circle correctly, place the dimples in an appropriate manner and include some shading and the result will be a realistic-looking ball and not a flat circle with dots.
The Short Version
| Step | What to do | Why it matters |
|---|---|---|
| 1 | Draw a clean circle | Every other step depends on a round shape |
| 2 | Pick a light direction | It decides where the highlight and shadows go |
| 3 | Sketch curved guidelines across the ball | They help the dimples follow the round surface |
| 4 | Place dimples in rows along the guidelines | Even spacing makes the pattern look real |
| 5 | Make edge dimples smaller and more oval | This is what makes the ball look round |
| 6 | Shade inside each dimple on the side facing the light | Dimples are dents, so their shadows fall inward |
| 7 | Shade the ball itself, darkest away from the light | It gives the ball form and weight |
| 8 | Add a cast shadow under the ball | It sits the ball on the ground |
| 9 | Lift out a bright highlight and clean up | It adds shine and finishes the drawing |
What You Need
| Supply | What it is for |
|---|---|
| Drawing paper | Any smooth sketch paper works, and heavier paper handles erasing and blending better |
| HB pencil | Light sketching, guidelines and dimple outlines |
| 2B pencil | Mid-tone shading on the ball and inside the dimples |
| 4B or 6B pencil | The darkest shadows under and beside the ball |
| Kneaded eraser | Lifting out highlights and softening lines without smudging |
| Blending stump or tissue | Smoothing shading so the ball looks polished |
| Compass, or a round jar lid or cup | Getting a perfect circle without freehand wobble |
Before You Start: What a Golf Ball Really Looks Like
A golf ball is always at least 1.68 inches in diameter and has many tiny hollows on its surface. These hollows are called dimples. Usually, there are more than 300 but less than 400 dimples in a specific arrangement of rings and larger dimples inside them. There is no need to know their precise number; the pattern should be even and follow the round shape of the ball.
The most crucial information is that dimples are hollows, not protrusions. This fact influences the way dimples are shaded. If there is a protrusion, the side facing the light source is always bright. Dimples, being hollows, get shaded because the light is blocked by the rim of the hollow, while the wall inside it receives the light.
Step-by-Step: How to Draw a Realistic Golf Ball
Step 1: Draw the Circle
Trace a circle with a diameter of approximately 3 or 4 inches using a jar lid or compass. Be careful not to make the circle too dark, as it is going to be erased eventually. If you choose to do this by hand, mark a point in the middle and four other points on all sides, equidistant from each other.
Step 2: Choose Where the Light Comes From
Choose one direction for the lighting, and then stick to that decision. Upper left is the simplest for most people to draw. Draw a small arrow in the corner of the paper to help you remember. Now the highlights always go towards upper left and shadows towards lower right.
Step 3: Sketch Curved Guidelines
Draw one curved line from left to right on the ball, slightly arching down, similar to the equator of the earth viewed from slightly above. Next, draw one curved line up and down, slightly arching sideways. Add another couple of curves, parallel to each one of them. These curved lines wrap around the ball and indicate the direction in which its surface is turning.
Step 4: Place the Dimples
Begin in the middle part of the sphere, where the dimples are larger and appear to be circular. Draw a circle, then draw several other circles around it to form rings. Each ring should contain five to six circles. Continue drawing rows of these circles while ensuring there is a space in between every dimple. Imagine a pattern similar to a honeycomb wrapped around a ball.
Step 5: Shrink and Squash Dimples Near the Edge
That is the stage where everything comes together. The dimples should be made smaller and narrower, in the shape of ovals, the long axis being along the border of the circle. At the border level, the dimples appear as thin slivers or notches. The dimples close to the border should also be made closer together because they appear at an angle.
Step 6: Shade Inside the Dimples
Using a 2B pencil, create a crescent of shading within each indentation on the side of the ball which is closer to the source of light. So for example, using a light source above and to the left, create a crescent of shading in the upper left side of every indentation while leaving the lower right part lighter.
Step 7: Shade the Ball
Then start shading the whole sphere in gradual stages. Make sure that the top left region remains lighter. The middle should be shaded using a soft midtone, while the bottom right side should be darkened gradually using a 4B pencil. Inside the bottom right corner, however, make it a little lighter. This is the reflected light coming up from the ground and making the sphere appear spherical.
Step 8: Add the Cast Shadow
Draw a flattened oval shadow on the ground, stretching away from the light toward the lower right. Make it darkest right where the ball touches the ground, and let it fade softly at the far end. Without this shadow, the ball will look like it is floating.
Step 9: Add the Highlight and Clean Up
Form a point with the kneaded eraser, lift a soft highlight from the upper left of the ball, and blend the hard pencil lines with the stump or tissue paper, erasing the guides and cleaning up the outline. The outline should be softened on the light side and more defined on the dark side.
A Quick Shading Guide
| Area | Pencil | How to shade it |
|---|---|---|
| Highlight | Eraser | Lift out a small soft spot on the side facing the light |
| Light side of the ball | HB | Very light, even strokes, with dimples barely shaded |
| Middle of the ball | 2B | A smooth mid-tone that blends into both sides |
| Core shadow | 4B | The darkest part of the ball itself, away from the light |
| Reflected light | 2B, lightly | A thin, slightly lighter band just inside the shadow-side edge |
| Contact shadow | 6B | The very darkest spot, right where the ball meets the ground |
| Cast shadow | 4B fading to 2B | Dark near the ball and softer as it stretches away |
How to Draw a Golf Ball on a Tee
A ball sitting on a tee is an excellent choice for a golf drawing. First draw the ball, and then the tee below it. The top part of the tee is a small cup that looks like a small ellipse partially covered by the bottom part of the ball. From both sides of the cup, you need to draw a tapering line ending at a point.
To achieve realistic proportions, the tee should be slightly longer than the diameter of the ball. A typical tee is 2.1 inches long, which is 1.3 times larger than the diameter of a golf ball, while a longer 2.7-inch tee is 1.6 times larger than the diameter of the ball. You can shade one side of the tee in relation to your light source and add some blades of grass around it.
An Easy Golf Ball Drawing for Kids
Younger kids do not have to draw perfect dimples. This fast method requires only several minutes.
First, you draw a circle by using a cup. Then draw a little tees underneath this circle – a narrow triangle with a flat top. Draw small c-shapes inside of your ball or small circles in lines that get progressively smaller closer to the edge of the ball. Add grass with sharp tops and color the grass green and tees brightly colored. Let the ball be white or neon-colored.
Fun Golf Ball Drawing Ideas
When you learn how to draw a simple golf ball, experiment a bit with some variants to improve your skills. A golf ball that is located right next to the hole border is quite a tricky task, as the hole is always depicted as an oval. Drawing a golf ball flying in the air with a couple of speed lines is another variant that includes adding some dynamics. A cartoon golf ball with a face and arms is a great character that will appeal to kids. As a challenge, try drawing a golf ball in close up view that lies in the rough with the blades of grass partly covering the ball.
If you are drawing the ball using digital techniques, then the process remains the same. Draw all elements separately on different layers, use the soft airbrush to shade the ball, change the dimple layer to multiply blend mode.
Common Golf Ball Drawing Mistakes
| Mistake | Why it looks wrong | How to fix it |
|---|---|---|
| All dimples the same size | The ball looks flat, like a button | Shrink and squash dimples toward the edges |
| Dimples drawn as dark dots | The ball looks spotty instead of dimpled | Draw small circles with a crescent of shade inside |
| Shading dimples like bumps | The surface looks bumpy instead of dented | Shade the side of each dimple closest to the light |
| No cast shadow | The ball seems to float | Add a dark contact shadow and a soft shadow on the ground |
| Hard black outline all the way around | It looks like a sticker | Soften the outline on the lit side |
| Random dimple placement | The pattern looks messy | Follow curved guidelines and keep gaps even |
Part 2: How to Draw a Golf Ball on the Course
In golf, the term “draw” describes a golf ball shot that will curve slightly from right to left for a right-handed player, and from left to right for a left-handed player. This kind of shot typically begins right of the intended target point and curves towards it. Most players like drawing shots as they have a tendency to travel with an aggressive and penetrating flight pattern, and also run longer after landing on the ground.
This procedure is based on right-handed golfers. The lefties just need to switch left and right.
What Makes a Golf Ball Draw
These two factors determine the curve of the ball after impact: the orientation of the clubface and the swing path of the club. The ball will tend to travel in the direction of the orientation of the clubface and will curve away from the swing path.
In a case of a draw, the swing path will start inside and finish slightly to the right of the target line, while the orientation of the clubface will be slightly left of the swing path, but still right of the target. The ball will begin traveling to the right and will curve back to the left. However, it is important to emphasize the slight angle; otherwise, the draw will become a hook.
How to Set Up to Hit a Draw
| Setup key | What to do |
|---|---|
| Pick a start line | Choose a spot a little right of your target where you want the ball to start |
| Body alignment | Aim your feet, hips and shoulders along or slightly right of that start line |
| Clubface | Point the clubface between your start line and the target, so it is closed compared with your body line |
| Grip | Turn your lead hand slightly away from the target so you can see two or three knuckles on it |
| Ball position | Move the ball a touch back from your normal spot with irons, which helps you catch it on an inside path |
| Mindset | Commit to the shot and picture the ball starting right and curving back |
How to Swing to Hit a Draw
Swing Along Your Body Line
Once you have done this, swing along your feet and shoulders, not toward the target. Since your body is properly aligned to the target, this will automatically create the inside-out swing necessary for drawing the ball.
Start the Downswing With Your Lower Body
Begin the downswing with a small shift of your hips toward the target. This lets the club drop to the inside instead of coming over the top, which is the move that causes slices.
Let the Clubface Release
Through impact, allow your forearms to rotate naturally so the clubface closes a little relative to the path. Do not flip your hands. Just let the club turn over as your body keeps rotating.
Finish Your Swing
Swing through to a full, balanced finish. Slowing down or holding off the release is one of the most common reasons a planned draw becomes a push to the right.
Drills to Learn the Draw
Alignment Stick Drill
Place an alignment stick to your side that is a bit right of your target, and place another stick directly on target but outside of the ball. Align yourself to the first stick, position the club face in between the two sticks, and swing from the first stick.
Headcover Drill
Position the headcover about six inches away from the ball. In case your swing is on the top, then you’ll make contact with it. However, swinging from the inside avoids making contact with the headcover and develops the draw swing path.
Right Field Drill
Picture the ball’s start line as right field on a baseball diamond. Make practice swings that feel like the club is heading toward right field after impact, then hit shots with that same feeling.
Fixing a Draw That Goes Wrong
| What the ball does | What is happening | How to fix it |
|---|---|---|
| Starts right and hooks well left | The face is closed too much compared with the path | Soften the grip change, or aim the clubface a little further right |
| Starts right and stays right | The face is square to the path, which makes a push | Let the clubface release more through impact |
| Starts right and curves further right | The face is open to the path, which makes a push slice | Check your grip and focus on releasing the club |
| Starts left and curves further left | The path is moving left and the face is closed, which makes a pull hook | Aim your body further right and swing along that line |
| Starts straight and stays straight | Face and path are both square | Not a bad result, but exaggerate the body aim a little for more curve |
Draw vs Fade vs Hook
| Shot shape | How it curves for a right-hander | What it is good for |
|---|---|---|
| Draw | Starts slightly right and curves gently left | Extra roll, holes bending left, and pins on the left |
| Fade | Starts slightly left and curves gently right | Softer landings, control, and pins on the right |
| Hook | Curves sharply and too far left | Usually a mistake, though it can bend around trees in trouble |
| Slice | Curves sharply and too far right | Usually a mistake that costs distance |
Final Take
Whether you want to learn how to draw a golf ball with a pencil or on a course, there are some simple steps to do it. Draw a good circle on paper, draw curves for your dimples using curved guidelines, make dimples small and more oval-shaped at the edges of the ball, and then shade each dimple from the side facing the source of the light. On the course, position your body slightly to the right, place the clubface between the line of your body and your target, and swing along the line of your body, line, and let the club release. Practice either one a few times, and you will be drawing golf balls with confidence.
Frequently Asked Questions
How many dimples should I draw on a golf ball?
You do not need an exact count. Real golf balls usually have about 300 to 400 dimples, but in a drawing you only see about half the ball, so anywhere from a few dozen to around a hundred evenly spaced dimples that shrink toward the edges will look realistic.
How do you make a golf ball drawing look 3D?
To make a golf ball drawing look 3D, make the dimples smaller and more oval near the edges, shade the ball darker on the side away from the light, and add a highlight and a cast shadow. A thin band of lighter reflected light along the shadow edge adds even more depth.
What is the easiest way to draw a golf ball for kids?
The easiest way is to trace a cup for the circle, fill it with small C shapes or little circles in rows, and add a simple tee and some grass underneath. Kids can then color the tee and grass and leave the ball white or make it a bright color.
What pencil is best for drawing a golf ball?
An HB pencil is best for sketching the circle and dimples, a 2B works well for mid-tones, and a 4B or 6B pencil gives you the dark shadows. A kneaded eraser helps lift out a clean highlight.
Why do dimples look oval near the edge of the ball?
Dimples look oval near the edge because that part of the ball is curving away from you. You see those dimples at an angle, so they appear narrower and smaller, the same way a circle on a turning globe looks squashed near its sides.
What does it mean to draw a golf ball in golf?
To draw a golf ball in golf means to hit a shot that curves gently from right to left for a right-handed golfer. For a left-handed golfer, a draw curves from left to right.
How do you hit a draw with a driver?
To hit a draw with a driver, tee the ball up, aim your feet and shoulders slightly right of the target, point the clubface between that line and the target, and swing along your body line. A slightly stronger grip helps the face close a little through impact.
Is a draw better than a fade?
A draw is not automatically better than a fade. A draw often rolls further, while a fade usually lands softer and is easier to control, so the best shot shape is the one you can repeat consistently.
Also read about: How Long Do Golf Cart Batteries Last? Lifespan by Battery Type, Plus How to Make Them Last Longer