

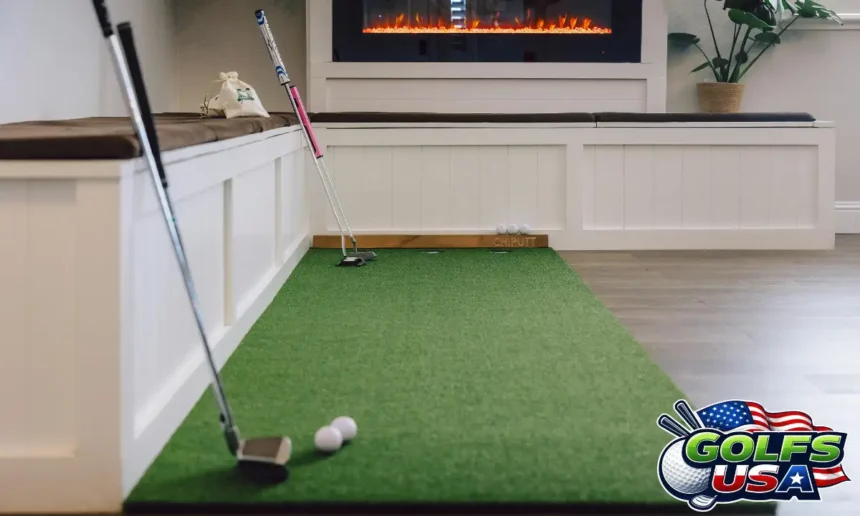
How to set Up a golf Training room at home, one should choose an area that has not less than a 9-foot ceiling height and 10 to 14 feet width and 15 to 18 feet depth and then design it by having a hitting bay, which includes a mat, a net or impact screen and a launch monitor. Adding a putting area, proper lighting, and video recording equipment will create a golf training room where you can train properly throughout the year.
This is how a golf training room should be set up at home, but in fact, many factors will define its functionality. The appropriate dimensions will depend on the launch monitor, the room design on the area you have, and the budget will vary between a couple of thousand dollars to five figures and above. This guide covers all aspects and requirements of creating a training room, including measurements, room design options, budget considerations and other useful tips.
The Short Version
| Step | What to do |
|---|---|
| 1. Measure the space | Check ceiling height with a real driver swing, then measure width and depth wall to wall |
| 2. Decide the room’s job | Pure practice, a full simulator, or a mix of full swing, putting and short game |
| 3. Choose a launch monitor | Match the type to your room depth, since radar units need more space than camera-based ones |
| 4. Set up the hitting bay | Hitting mat, net or impact screen, side protection and a buffer behind the screen |
| 5. Add the display | A tablet or TV for practice data, or a short-throw projector for a full simulator |
| 6. Build the extra zones | Putting green, chipping spot, mirror, video camera and a small mobility area |
| 7. Sort the details | Lighting, power outlets, flooring, sound, temperature and storage |
Step 1: Measure Your Space the Right Way
Before buying anything, measure the room. The important dimensions are height of the ceiling, width and depth, and height of the ceiling is the dimension that cannot be compromised on.
To determine if the ceiling is adequate for your swing, stand in the place from which you intend to strike, grab your club and perform a smooth full backswing and through-swing. Place a piece of tape on the ceiling at the peak of the backswing. Ideally, there should be six to nine inches between the top of the tape and the ceiling, since actual swings are faster and slightly less controlled than practice swings.
| Measurement | Bare minimum | Comfortable | Ideal |
|---|---|---|---|
| Ceiling height | 9 feet | 10 feet | 10 to 12 feet |
| Room width | 10 feet, with an offset hitting spot | 12 to 14 feet | 15 feet or more, with a centered hitting spot |
| Room depth | 15 feet | 16 to 18 feet | 18 to 20 feet or more |
| Ball to screen or net | 10 feet | 10 to 12 feet | 12 feet |
| Space behind the ball | 4 to 5 feet | 6 to 7 feet | 7 feet or more |
| Gap behind an impact screen | 12 inches | 12 to 16 inches | 16 inches |
Width becomes crucial where both left-handed and right-handed golfers are expected to hit in the room. The best hitting zone that will fit everyone should be around 14 feet wide. However, where the room is narrower, move the hitting zone to one side to ensure that there is enough space during the follow-through process.
Moreover, there must be a clearance of at least 4 feet on this side of the room. Obstacles such as light fixtures, fans, beams, duct work, garage door tracks, and low hanging pipes can change a safe room into an unsafe one.
Step 2: Decide What Kind of Training Room You Want
A golf training room can be built in very different ways, and knowing its main job keeps you from overspending on the wrong things.
| Type of room | What it includes | Best for |
|---|---|---|
| Practice room | A net, a hitting mat, a basic launch monitor and a tablet or phone for data | Grooving your swing, checking distances and working on contact without a big budget |
| Full simulator room | An enclosure with an impact screen, a camera-based launch monitor, a projector and simulator software | Playing virtual rounds, practicing with real ball flight on screen, and having friends over |
| All-round training room | A hitting bay plus a putting green, chipping spot, mirror, camera and mobility corner | Golfers who want to improve every part of their game, not just the full swing |
| Low-ceiling skills room | A putting green, short game mats, swing trainers and alignment tools | Rooms under 9 feet where a full driver swing is not safe |
The majority of golfers seeking to reduce their score should focus on the all-inclusive room. It is always enjoyable to work on the full swing, but putting and short shots account for a significant portion of each game, and they are also easy to practice at home.
Step 3: Choose a Launch Monitor That Fits Your Room
The launch monitor controls the brain of the room. The launch monitor is responsible for the ball speeds, launch angles, spin and club information, and it determines your room setup more than what people think. The three basic types are as follows.
| Type | Where it sits | Room depth needed | Good to know |
|---|---|---|---|
| Radar | On the floor several feet behind the golfer | About 18 to 20 feet | Often the cheapest option, but it needs extra depth and can struggle with spin readings indoors |
| Side-mounted camera | On the floor beside the ball, facing the golfer | About 15 to 17 feet | Works well in shorter rooms and reads spin accurately, but left-handers may need to move it |
| Overhead camera | On the ceiling above the hitting area | About 15 to 18 feet | Out of the way, safe from stray shots, and easy for left- and right-handers to share, but it needs a suitable ceiling height |
When your room is less than 16 feet in depth, then the best way to go would be the one that utilizes the camera. For those who have a large garage or basement space, then the radar can provide additional possibilities. In any case, always make sure to consult the manufacturer’s guidelines on positioning.
Step 4: Set Up the Hitting Bay
The hitting bay is the heart of the room, and getting it right keeps both you and your house safe.
The Hitting Mat
Always buy the best mat possible. Cheap, light mats allow the club to bounce on the surface, concealing bad ball contact, and could cause you problems later on with your wrists and elbows. Choose one that is thick and dense enough so you can swing down onto the ball, and that is large enough so you have somewhere to stand firmly. Most players use a second stance mat to keep their feet even with the ball.
Net or Impact Screen
The best net is the most economical way to ensure that you will catch the full ball, and this device will work just fine in a training room. As for a simulator, an impact screen is the next stage, since a projector can project the trajectory of the ball onto it. The screen should be hung at a distance of 12 to 16 inches from the wall.
Side Protection
Miss hits can occur, even for professional players. The side netting or padding on the sides will prevent any shanks or thin hits from bouncing off to smash into walls, windows, and even the TV. If you really want security, go for an all-around covered net, especially if there are lights installed on the ceiling.
Step 5: Add the Display
Whereas for a practice room, all that you require is a tablet, laptop or a television fixed on the wall. This will show your stats after every hit, while most launch monitors use phones or tablets to run their applications.
When looking at a full simulator, then what you need is a projector. You may consider using a short throw projector installed on the ceiling either right in front or just a bit behind the hitting area. This will enable you to fill up a big screen even from a small distance without interfering with the swing path. Ensure that the projector is powerful enough so that it works well even when there is light in the room since you will need it for the launch monitor and for safety reasons. Install the projector away from the path of the balls, and protect it with a cage or case when necessary.
Some simulation applications are run by tablets, whereas others are run by computers. Make sure to find out what your choice requires in terms of computing power and subscription.
Step 6: Build the Other Training Zones
This is how the hitting bay is turned into a proper training area. It is not necessary to have an extensive area for these, and each one provides great value.
Putting Area
For most players, the putting green would be the best addition. Try to make sure that the area is not less than 10 to 12 feet in length so that you can work on the most important putts. Putting green mats will simulate a green much better than your house floor will. The putting mirror and the alignment gate will help in checking your stance and starting line.
Chipping and Short Game Spot
Using a small chipping net or target that is set up on a mat on the side of the hitting area, enables the practice of short pitches or chips. When practicing indoors, ensure that the shots are directed far away from anything breakable.
Mirror and Video Zone
The full-length mirror near the hitting net is one of the simplest and most effective training tools that money can buy. In terms of the video, place a camera on a tripod at two locations, one behind you on the target line, and one in front of you. Recording some swings at every practice will allow you to see the difference between feeling and reality.
Mobility and Warm-Up Corner
A mini rubber flooring section with a foam roller, resistance bands, and light medicine ball provides an area where warming up is possible before starting to play. Enhanced rotation and flexibility will be good for your swing, and a proper warm-up will make your indoor game less stressful for your body.
Step 7: Sort the Room Details
The details make all the difference when it comes to the room’s overall usability on a weekly basis.
The lighting needs to be bright and even, with no light fixtures hung in the swing zone. Flush mount or recessed LED lighting will do the trick and camera-based launch monitors need the brighter room for accuracy, while placing the lights over the hitting area on a different switch will allow you to turn down the light next to the screen without turning down everything.
The electricity supply is a very important detail. Make sure that you have enough outlets for the launch monitor, projector, computer, TV and a fan or heater; place the projector in the ceiling outlet if possible. Keep your cables either mounted to the wall or to the ceiling in order to avoid cable crossing your floor space.
The floor should be comfortable and forgiving. Rubber turf with a rubber pad underneath is comfortable to walk on and makes the ball drop more quietly. If the room is in a garage or a basement, install the turf on a flat surface and fix any uneven areas around the hitting mat.
Sound can come as a surprise to you. Hitting a ball against the screen is noisy, so it’s good to have acoustic panels on the walls, a good screen with some padding underneath, and a carpet outside the hitting zone.
Temperature and humidity are important in garages and basements. All the electronics, screen, and balls will work much better in a room that is neither too cold nor too humid. You may need a mini-split, a space heater with a fan, or a dehumidifier, can make the room usable year round.
How Much a Golf Training Room Costs
The costs can vary significantly based on the type of launch monitor, the screen required, and any finishing the room requires. While these numbers provide an accurate representation of the typical cost of a home setup, keep in mind that costs fluctuate regularly.
| Setup | What it usually includes | Typical total | Who it suits |
|---|---|---|---|
| Skills room | Putting green, short game mats, mirror and training aids | About $300 to $2,000 | Low ceilings or tight budgets |
| Practice room | Net, quality mat, entry-level launch monitor and a tablet | About $1,500 to $3,000 | Golfers who want data without a big build |
| Full simulator room | Enclosure, impact screen, camera-based launch monitor, short-throw projector, computer and software | About $5,000 to $12,000 | Most serious home golfers |
| Premium training room | High-end launch monitor, custom enclosure, putting green, lighting, sound and finishing work | About $20,000 to $40,000 or more | Golfers who want a showpiece room |
The launch monitor would be the single largest expense. An entry-level radar device would typically cost a few hundred dollars while a good quality camera system would range into the low thousands and the tour level launch monitor would cost several thousands of dollars. Bear in mind that even if you buy an inexpensive launch monitor, you will still have to pay for the mat, screen, and display.
Golf Training Room Ideas for Different Spaces
| Space | What usually works | Watch out for |
|---|---|---|
| Garage | A full simulator or practice bay, since garages often have the depth and width | Garage door tracks and openers in the swing path, cold winters and hot summers, and uneven concrete floors |
| Basement | A finished simulator room with a putting green along one wall | Low ceilings, beams, ductwork, and damp air that needs a dehumidifier |
| Spare bedroom | A putting and short game room, or a net setup if the ceiling allows full swings | Standard 8-foot ceilings, which are usually too low for a driver |
| Bonus room or loft | A mixed room with a hitting bay and a lounge area | Noise traveling to rooms below, and sloped ceilings |
| Backyard studio or shed | A dedicated golf building sized for a full swing | Permits, power supply, insulation and security for expensive gear |
Smart Ideas That Make the Room Better
Once the basics are in, a few extra touches make a big difference to how much you use the room.
Paint Alignment Lines Into the Turf
Mark a target line and ball position guides on the floor turf with tape or turf paint. It saves time every session and keeps your setup consistent.
Build a Wall for Clubs and Balls
A slatwall or pegboard with club holders, shelves for balls and hooks for training aids keeps everything off the floor and ready to grab.
Add a Second Screen for Stats
A TV on the side wall showing your shot data lets you keep the projector screen for ball flight while tracking numbers at a glance.
Pad the Ceiling Above the Tee
A few foam panels on the ceiling above the hitting spot protect both the ceiling and your clubs if you ever catch it on a big swing.
Use a Drop-Down or Retractable Setup
In a room that has to share space with a car, a gym or guests, a retractable screen or a net that folds away lets you switch between uses in minutes.
Keep a Practice Log on the Wall
A whiteboard with your goals, stats and weekly plan keeps each session focused on improvement instead of just hitting balls.
A Simple Weekly Plan for Your Training Room
A great room only helps if you use it with purpose. This simple weekly plan fits into short sessions and covers every part of the game.
| Day | Focus | What to do |
|---|---|---|
| Monday | Putting | 20 minutes of start-line drills and short putts inside 6 feet |
| Tuesday | Full swing contact | Warm up, then hit wedges and mid irons, checking strike and launch numbers |
| Wednesday | Short game | Chips and pitches to set targets, changing distance every few shots |
| Thursday | Driver and woods | Work on start line and consistency, filming a few swings to review |
| Friday | Mobility and speed | A longer warm-up, rotation work, and a few sets of speed swings |
| Weekend | Play and test | Play a virtual round or a skills challenge, then note what needs work next week |
Common Mistakes to Avoid
Buying the equipment before taking the measurements is probably the most frequent error that people make, leading to a launch monitor which does not work in your room. Measure first and test the ceiling with an actual swing.
Another mistake is standing too close to the net and screen. The balls bounce off much harder than you think, so you need at least 10 feet of distance between the ball and the screen, as well as some space behind it.
Using a cheap mat leads to many issues that most people overlook. Not only does the mat conceal poor swings, but it might actually hurt you, so it is better to invest a little extra.
Neglecting the short game is one step ahead of missing out on an opportunity. Designing your swing room only for full swings means ignoring the most stroke-saving hits.
Finally, do not forget about light and power. Bad lighting can impact camera-based launch monitors, while using extension cords across the floor in your swing room is a safety risk.
Final Take
Creating a golf training room requires proper planning in the following sequence: measuring the area, defining the purpose of the room, selecting a suitable launch monitor, building a safe hitting station, and then incorporating a putting, short-game, and video station. A room with a ceiling height of 10 feet, width of about 14 feet and 16 to 18 feet depth will provide maximum flexibility, but a small room with a low ceiling can still be used to train the putting and short-game skills. Design it according to your requirements, and it will benefit you always when you play.
Frequently Asked Questions
How big does a golf training room need to be?
A golf training room for full swings needs at least a 9-foot ceiling, about 10 feet of width and around 15 feet of depth. A room with a 10-foot ceiling, 14 feet of width and 16 to 18 feet of depth is far more comfortable and works with more launch monitors.
What ceiling height do you need to swing a driver indoors?
Most adult golfers need a ceiling of at least 9 feet to swing a driver indoors, and 10 feet is more comfortable. Tall golfers and players with steep swings may need even more, so test with a slow driver swing before building.
Can you set up a golf training room with an 8-foot ceiling?
An 8-foot ceiling is usually too low for a full driver swing, but it works well for a putting and short game room. Some golfers can hit shorter irons with a controlled swing, but always test carefully first.
How much does it cost to set up a golf training room?
A basic golf practice room with a net, mat and entry-level launch monitor usually costs about $1,500 to $3,000. A full home simulator room typically runs about $5,000 to $12,000, and premium rooms can cost $20,000 to $40,000 or more.
How far should you stand from a golf net or impact screen?
Place the ball about 10 to 12 feet from a golf net or impact screen. That distance lets launch monitors read the ball flight and gives balls room to slow down before they bounce back.
Is a garage or basement better for a golf training room?
A garage often has more depth and width, which suits a full simulator, but it can get very hot or cold. A basement is easier to keep comfortable and quiet, but low ceilings and beams can limit full swings.
Do you need a launch monitor for a golf training room?
Place the ball about 10 to 12 feet from a golf net or impact screen. That distance lets launch monitors read the ball flight and gives balls room to slow down before they bounce back.
What should be in a golf training room besides a simulator?
Besides a simulator, a good golf training room includes a putting green, a chipping area, a full-length mirror, a phone tripod for swing video, and a small warm-up space with a foam roller and resistance bands.
Also read about: How Old Is Gabby Golf Girl? Her Age, Birthday, and Career Timeline